Setting up a blog with Hugo and Netlify
Hugo is a static site generator that claims to be the world’s fastest framework for building websites. I’ve used jekyll in the past to set up a blog but found it clunky to use and the build time to be quite slow. So far Hugo has been really easy to set up and I’m loving the huge number of themes to choose from and how easy it is to switch between them.
Deploying a new Hugo site is also really easy. In the past I’ve used GitHub Pages and also Firebase for hosting. However this time I’ve decided to use Netlify as I’ve heard quite a lot of great things about it.
This post should serve as a quick tutorial for getting yourself set up with a new Hugo blog hosted on Netlify.
Install Hugo.
For me this was on Ubuntu so I’ll go into detail for that. If you’re using a Mac or Windows or another Linux distro, head to the official installation page and follow the instructions there. You can skip over to the next section once you’re up and running.
The official instructions say to use
sudo apt-get install hugobut I found that the version was old and some themes no longer worked with that version. Instead I usedsnap install hugoto get the latest version. However, I then had to use the commandsnap run hugowhenever I needed to use Hugo, so I created an aliasalias hugo="snap run hugo"to make things a bit easier. Runhugo versionto make sure you’re using the most recent version available, at the time of writing the most recent version is 0.34.Create a new site.
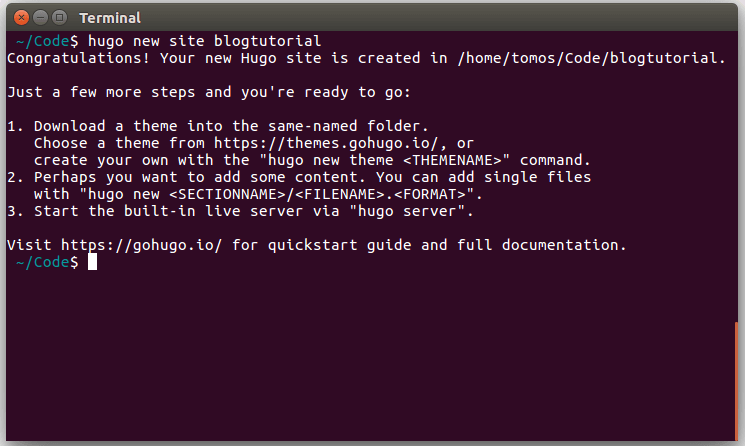
In your terminal, navigate to the parent directory where you want to store your new site. Run
hugo new site blogtutorial. This will create a new directory containing all the scaffolding required for your new Hugo site.
Choose a theme.
Hugo has a huge range of themes to choose from, or you can create your own if you prefer. I’ve gone for the Hyde theme for this blog so we’ll use that for this tutorial. Install the theme in your themes/ directory.
cd themes git clone https://github.com/spf13/hyde.gitThen add the theme to your config.toml file by adding the line
theme = "hyde"at the top of the file.
Create your first post.
Run
hugo new posts/my-first-post.md. This will create a new file in content/posts/ namedmy-first-post.md. Go ahead and edit that file with some dummy content.Build and run.
Run
hugoto build your site. Hugo will generate the site inside the public/ directory. Now runhugo serve -DThe -D flag is to enable drafts. Your site will now be viewable on http://localhost:1313/.
And that’s it, you’re set up with Hugo. Check out the Hugo docs for more in depth information.
Now it’s time to get our site deployed to Netlify.
Push your site to GitHub
Set up a Git repository on GitHub and push your new Hugo blog to the repository.
Tip: add your public/ directory to your .gitignore file.
You won’t need it as Netlify will run the
hugocommand and generate the folder for you.Set up Netlify
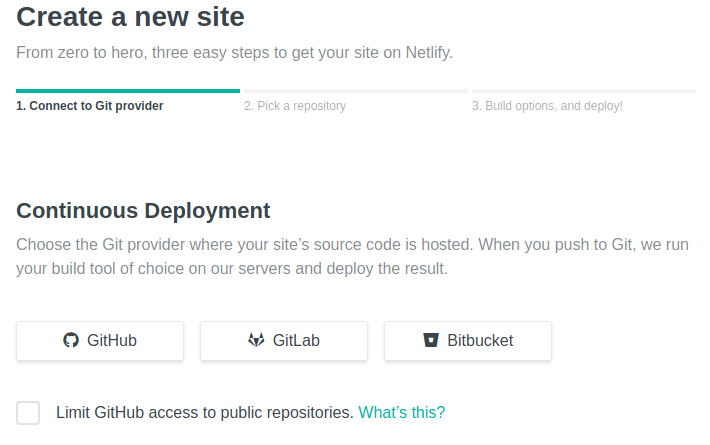
Head over to netlify.com and sign up if you haven’t already. Once you’re all signed up, head to app.netlify.com and click on
New site from Git. Here you can link your GitHub account and choose your new blog repository.
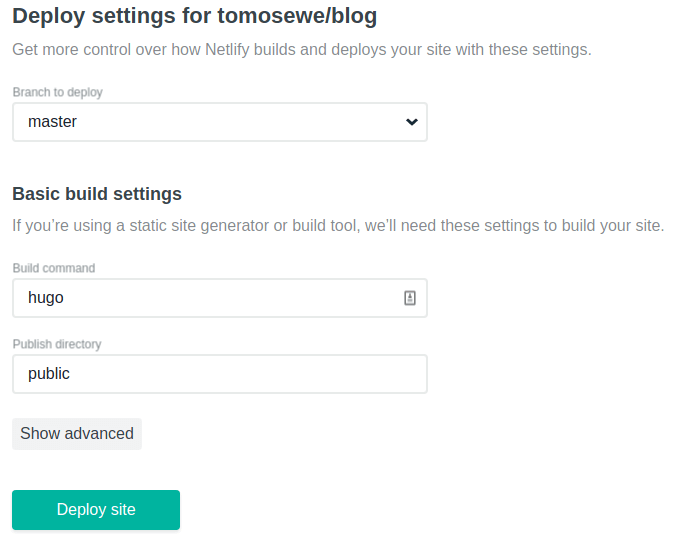
Choose to deploy your master branch. Set the build command to be
hugoand the public directory topublic
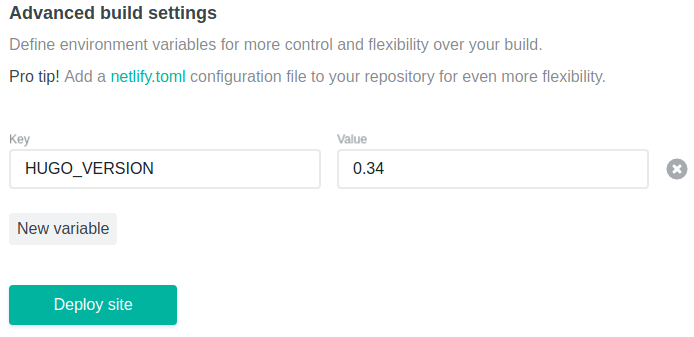
Click on the
Show advancedbutton. We’re going to add a new key to make sure that Netlify uses the latest version of Hugo to build our site. EnterHUGO_VERSIONas the key and0.34(or the current latest version of Hugo) as the value.
Hit the
Deploy sitebutton and your site will be live!
The first time you view your site from Netlify you may notice that none of the styling is working. This will be because we need to set the base url for the site in our config.toml file.
Modify the baseurl in your config.toml file to point to your Netlify url.
baseurl = "https://your-site-name.netlify.com/"`Now push your site to GitHub again and your styles should be pulling through correctly.
You’ll notice that just pushing to your master branch is enough to deploy a new change to your site.
Enjoy your new Hugo blog hosted on Netlify!